Getting a new roof is a significant roofing project, and preparing well sets the stage for a smoother roof replacement process. Whether you’re replacing your roof due to age, leaks, or to boost curb appeal and energy efficiency, understanding each step helps you prepare your home and protect your home. From choosing the right roofing materials to coordinating with a roofing contractor, the installation process for installing a new roof or planning a new roof installation benefits from clear expectations and professional roofing guidance.
Understanding Roof Replacement
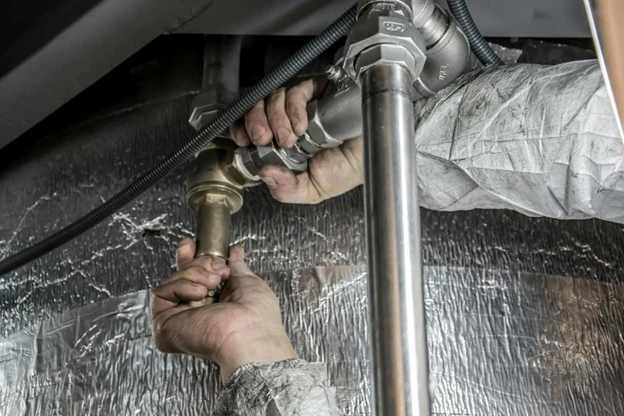
Roof replacement involves removing the old roof down to the roof deck and installing a roof system with new shingles or alternative roofing materials. Unlike roof repairs, which address isolated issues, a full replacement renews the entire roofing system, ensuring long-term performance. A roofing contractor or roofer evaluates the roof deck, attic ventilation, and existing asphalt or metal roofing to plan the right roofing materials. For homeowners, understanding the scope, weather conditions, and debris management helps prepare for a roof replacement effectively.
What is Roof Replacement?
Roof replacement is a comprehensive process to replace your roof by stripping aging layers, repairing the roof deck, and installing a new roof with new shingles or other materials. The roofing team removes asphalt shingle systems or metal roofing panels, inspects flashing, underlayment, and ventilation, and then proceeds with installing a roof that meets modern standards. This process, which culminates in a complete renewal of your home’s top layer, is often considered the roof replacement high point for securing long-term home protection and value. A professional roofing crew coordinates material delivery, tarp protection, and debris disposal, ensuring the new roof integrates as a complete roofing system designed for durability, energy efficiency, and dependable weather resistance.
Signs You Need a Roof Replacement
Curled or missing shingles, widespread granule loss, recurrent leaks, sagging, and daylight through the deck signal the need for replacement. If roof maintenance and roof repairs no longer resolve issues, you may need a roof replacement project. Consider these common indicators:
- Water stains on ceilings, soft spots, and pervasive moss can indicate that the old roof has failed.
- Frequent repairs, storm damage, and poor energy efficiency are strong cues to invest in a new roof.
The Importance of Timely Roof Replacement
Delaying replacement risks structural damage, costly interior repairs, and insulation issues. Timely action lets you prepare for your roof replacement under favorable weather conditions, minimizing risks on the day of your roof replacement. Choosing the right roofing material and a qualified contractor protects your home, improves curb appeal, and elevates energy efficiency. A well-planned roof replacement project reduces disruptions, controls debris, and ensures the roofing crew can complete installing a new roof efficiently and safely.
Preparing Your Home for a Roof Replacement
Before work begins, take steps to protect your home and keep everyone safe. Prepare both outdoor and indoor areas, and make sure communication and safety measures are in place. Key actions include:
- Clear driveways for material delivery and debris trailers.
- Move patio furniture, grills, and potted plants to prevent damage.
- Cover items in the attic to shield them from dust and vibration.
- Remove wall decorations that could shift during the work.
- Notify neighbors about the roofing project.
- Confirm weather conditions with your roofing contractor.
- Secure pets and children during the installation process.
These steps help ensure a smoother, safer roofing project from start to finish.
Steps to Prepare Your Home
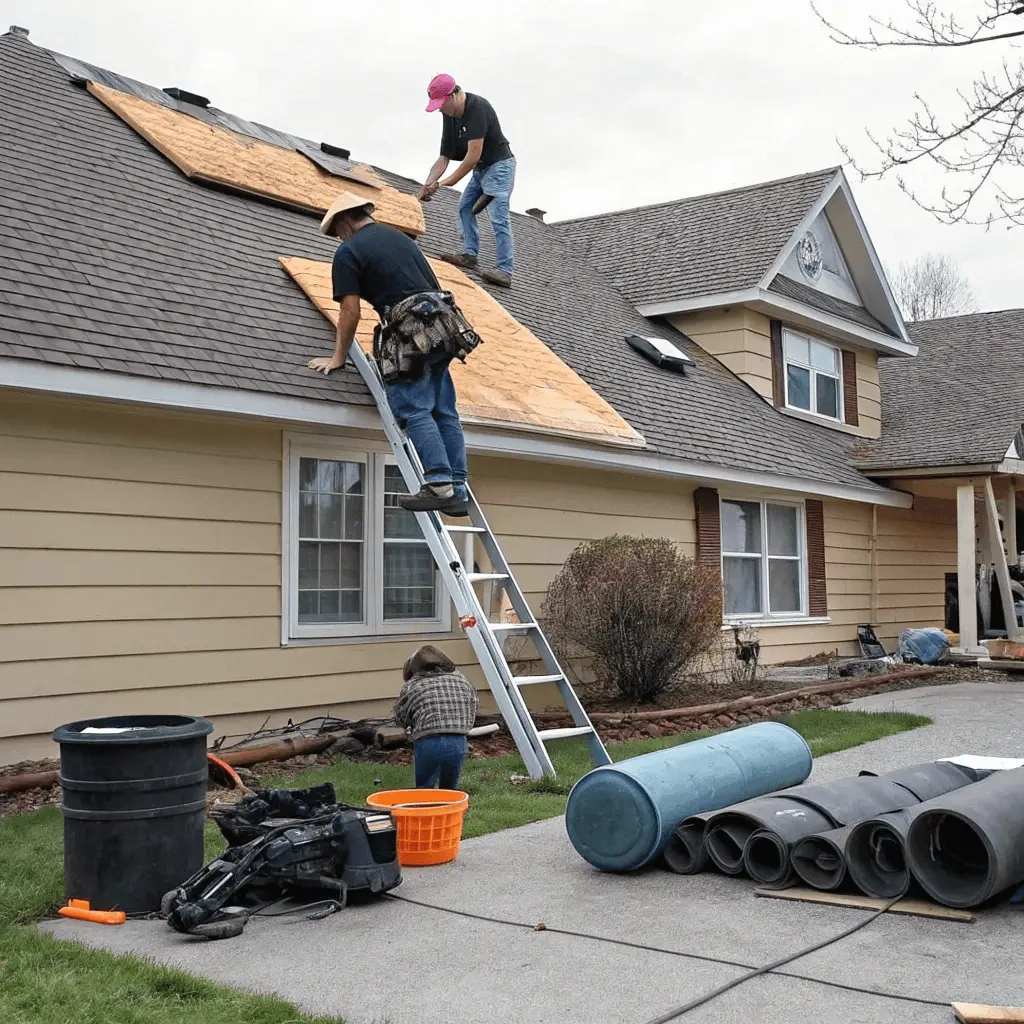
Start by scheduling a roof inspection with a roofer or roofing contractor to confirm the scope and roofing materials. Trim tree branches near the roof, mark sprinklers, and identify fragile landscaping. In the attic, lay tarps over storage, and relocate valuables. Park vehicles on the street to keep access clear for the roofing crew. Identify power outlets for tools, verify the contractor’s debris plan, and discuss tarp placement over landscaping. Confirm the timeline and sequence for removing the old roof and installing the new system.
What to Expect During the Roof Replacement Process
On the day of your roof replacement, the roofing team arrives early, sets safety measures, and stages materials. Expect removal to the deck, necessary repairs, installation of underlayment, flashing, and new roofing—plus noise and vibration. Debris is collected throughout the roof replacement project, with magnets used to capture nails. The contractor will adapt to weather conditions and keep you updated as the installation of a new roof progresses.
Protecting Your Property During the Roofing Project
Effective property protection combines planning and on-site safeguards. Use tarps, debris chutes, and plywood shields to protect landscaping, windows, and delicate surfaces. Request plywood protection for delicate surfaces and windows near the roof installation area. Inside, secure light fixtures below the roof and protect the attic. Ensure the contractor conducts frequent cleanups and a final magnet sweep. With clear pathways, labeled garden zones, and coordinated staging, you significantly protect your home and maintain curb appeal throughout the roofing project.
Choosing the Right Roofing Materials
Selecting the right roofing materials is essential to prepare for a new roof that balances durability, energy efficiency, and curb appeal. Consider asphalt shingle systems for versatility, or metal roofing for longevity and performance in varied weather conditions. Evaluate underlayment types, ventilation components for the attic, and flashing that integrates into the roofing system. Work with a professional roofing contractor to match materials to your budget, climate, and code requirements.
Types of Roofing Materials Available
Common options include three-tab and architectural asphalt shingles, prized for affordability and style. Metal roofing, such as standing seam steel or aluminum, offers superior longevity and energy efficiency. Premium choices like synthetic shingles mimic slate or wood with less maintenance. Each roof material integrates with underlayment, flashing, and ventilation to create a complete roofing system. Discuss impact/fire ratings and warranties to ensure material suitability for your deck, climate, and goals.
Factors to Consider When Choosing Roofing Materials
Balance climate, roof pitch, local codes, budget, and lifecycle performance (not just upfront cost). Consider energy efficiency and how the color and profile affect heat absorption. Evaluate the roof deck condition, attic ventilation needs, and maintenance expectations versus roof repairs. Review hail, wind, and fire ratings, plus warranty terms and contractor certification requirements. Think about curb appeal, resale value, and installation process complexity. Choosing the right roofing material means balancing upfront cost with lifecycle performance, debris management, and compatibility with professional roofing installation methods.
Consulting with a Roofing Contractor
Request a detailed scope, timeline, and line-item estimate, including materials, labor, and debris disposal. Ask about debris disposal, tarp protection, and contingency plans for weather conditions. A professional roofing partner will conduct a thorough roof inspection, assess the attic, and recommend the right roofing materials, ensuring your roof replacement delivers lasting performance and peace of mind.
The Roof Installation Process
The roof installation process turns planning into action by coordinating the roofing team, materials, and clear steps on the day of your roof replacement. A roofing contractor verifies the roof deck condition, stages roofing materials, and aligns the installation process with forecasted weather conditions. Whether you’re replacing your roof with asphalt shingles or metal roofing, the contractor orchestrates safety, debris control, and attic protection. For the homeowner, understanding how installing a roof unfolds helps prepare your home and protect your home throughout the roofing project.
Steps Involved in Roof Installation
First, the roofer performs a roof inspection and sets up tarp protection and debris chutes. The roofing crew removes the old roof, evaluates the roof deck, and makes roof repairs as needed. Underlayment and flashing are installed, followed by new shingles or panels for a complete roofing system. Ventilation and attic components are integrated to support energy efficiency. Quality checks at each stage ensure compliance with manufacturer guidelines and local codes.
How Long Does Roof Installation Take?
Typical asphalt shingle replacements take 1–3 days; complex roofs or metal systems can take longer. Metal roofing or intricate details add time for precise flashing and specialty components. If you’re replacing your roof on a large home or one with a steep pitch, additional days may be required for safety and staging. The roofing contractor factors in roof deck repairs, debris removal, and inspections. Clear communication about the timeline helps you prepare your home and plan around the day of your roof replacement.
Final Checks After Roof Installation
Verify flashing, ventilation, sealants, and cleanup; collect warranties and maintenance guidance. The roofer inspects flashing, ridge vents, and new shingles, confirms attic ventilation, and ensures sealants are properly applied. A magnet sweep removes nails and debris, and tarp protection is carefully taken down. The contractor documents the roof replacement process, provides warranty information, and reviews roof maintenance tips. This walkthrough helps the homeowner confirm curb appeal, energy efficiency measures, and that the right roofing materials were used as agreed.
Post-Installation Roof Maintenance
Post-installation roof maintenance preserves your investment and extends the life of your new roof. Routine care supports energy efficiency and early detection of issues that could lead to roof repairs. A roofing contractor can schedule seasonal checkups to assess the roof deck area, flashing, and attic ventilation. Keep gutters clear, manage nearby trees, and monitor weather conditions after storms. Proactive maintenance reduces repair costs and extends roof lifespan.
Maintaining Your New Roof
Keep gutters clear, trim branches, inspect the attic, and schedule annual professional inspections. To keep your roof in good condition, focus on smart inspection habits and gentle maintenance practices. Consider the following key actions:
- Inspect attic spaces for moisture or daylight, and confirm consistent ventilation.
- Schedule annual roof inspections with a professional roofing contractor to review flashing and sealants.
- Avoid pressure washing, which can damage an asphalt shingle surface.
- Document maintenance to support warranties, and use a tarp for temporary protection if minor issues arise before roof repairs can be completed by a roofer.
Signs of Roof Damage After Installation
Look for lifted shingles, loose flashing, granule loss, attic moisture, and storm-related impacts. Inside the attic, look for damp insulation, musty odors, or staining on the roof deck. After severe weather conditions, check for impact marks, bent metal roofing panels, or displaced ridge components. Persistent gutter overflow, sagging areas, or unusual energy bills can signal ventilation or moisture issues. Early detection allows a roofing contractor to address problems quickly, preventing larger roof replacement concerns and preserving curb appeal and performance.
When to Call a Roofer for Inspections
Call immediately for leaks or storm damage; schedule annual inspections and after major weather events. Schedule a professional roof inspection annually and whenever you’re replacing your roof components like vents or skylights. Engage roofing companies for post-installation checkups within the first year to ensure the roofing system is performing as expected. If debris accumulates or a tarp was used after damage, have the contractor verify underlying materials. Prompt inspections help protect your home and avoid premature roof replacement or costly roof repairs.